Hexo+Next配置博客

经过一段时间搭建成功了个人博客,可以进入我的个人博客 查看效果。这里对于搭建以及在默认设置的基础上做出的修改进行一下纪录。由于有一些设置是在很久以前完成的,步骤以及一些说明可能存在遗漏或者不完全正确,希望能够谅解并指正。

博客搭建依赖于 Hexo 博客框架+Next 主题。Hexo 是目前很流行的静态博客生成框架,它基于 Node.js 框架。使用此框架之后,可以直接使用 Markdown 来撰写博客,Hexo 在选取主题做好相应的设置之后会自动生成相应的网页,下面是具体的步骤。

安装 Node.js

首先进入 Node.js官网 ,根据自己的系统选择对应的版本进行安装,在我进行安装时的最新版本为 v20.5.1,在 windows 系统下按照提示并且安装选项全部默认即可,安装完成之后,可以打开 Powershell 或者 cmd 输入 node -vnpm -v,当出现版本号时即说明安装成功。

设置镜像源

node 的包管理器为 npm,我的版本为 9.8.0,由于国内网络问题,需要设置一下镜像源进行加速,这里参考博客 npm 使用国内镜像加速的几种方法
方法 1
设置全局镜像源(淘宝镜像)。

1
npm config set registry https://registry.npmmirror.com

设置完成之后,可以通过以下命令进行验证:

1
npm config get registry

如果返回 https://registry.npmmirror.com,说明镜像配置成功。

这里列举一些其他的镜像源作为备用:

1
2
腾讯云镜像源: http://mirrors.cloud.tencent.com/npm/
华为云镜像源: https://mirrors.huaweicloud.com/repository/npm/

方法 2
使用淘宝定制的 cnpm 作为包管理器。

1
npm install -g cnpm --registry=https://registry.npmmirror.com

此后可以不使用 npm install xxx 而换用 cnpm install xxx 进行包的安装。

安装 Git

首先进入 GitHub 官网,第一次使用时需要注册登录,在这里面需要新建一个 repository 来存放网站文件。

首先点击自己的用户头像,会出现以下界面:
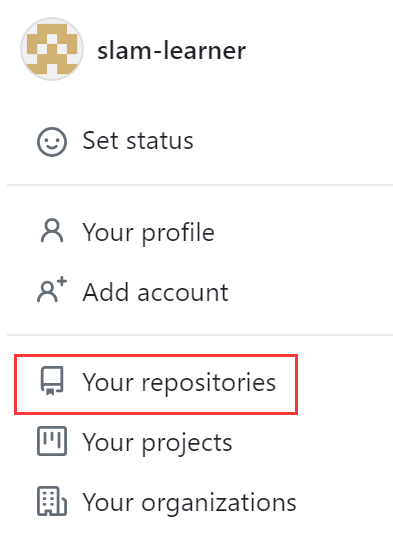
image.png

然后点击 New 新建仓库。
image.png

仓库必须命名为 你的GitHub用户名.github.io,并勾选上 README 初始化。如下所示:
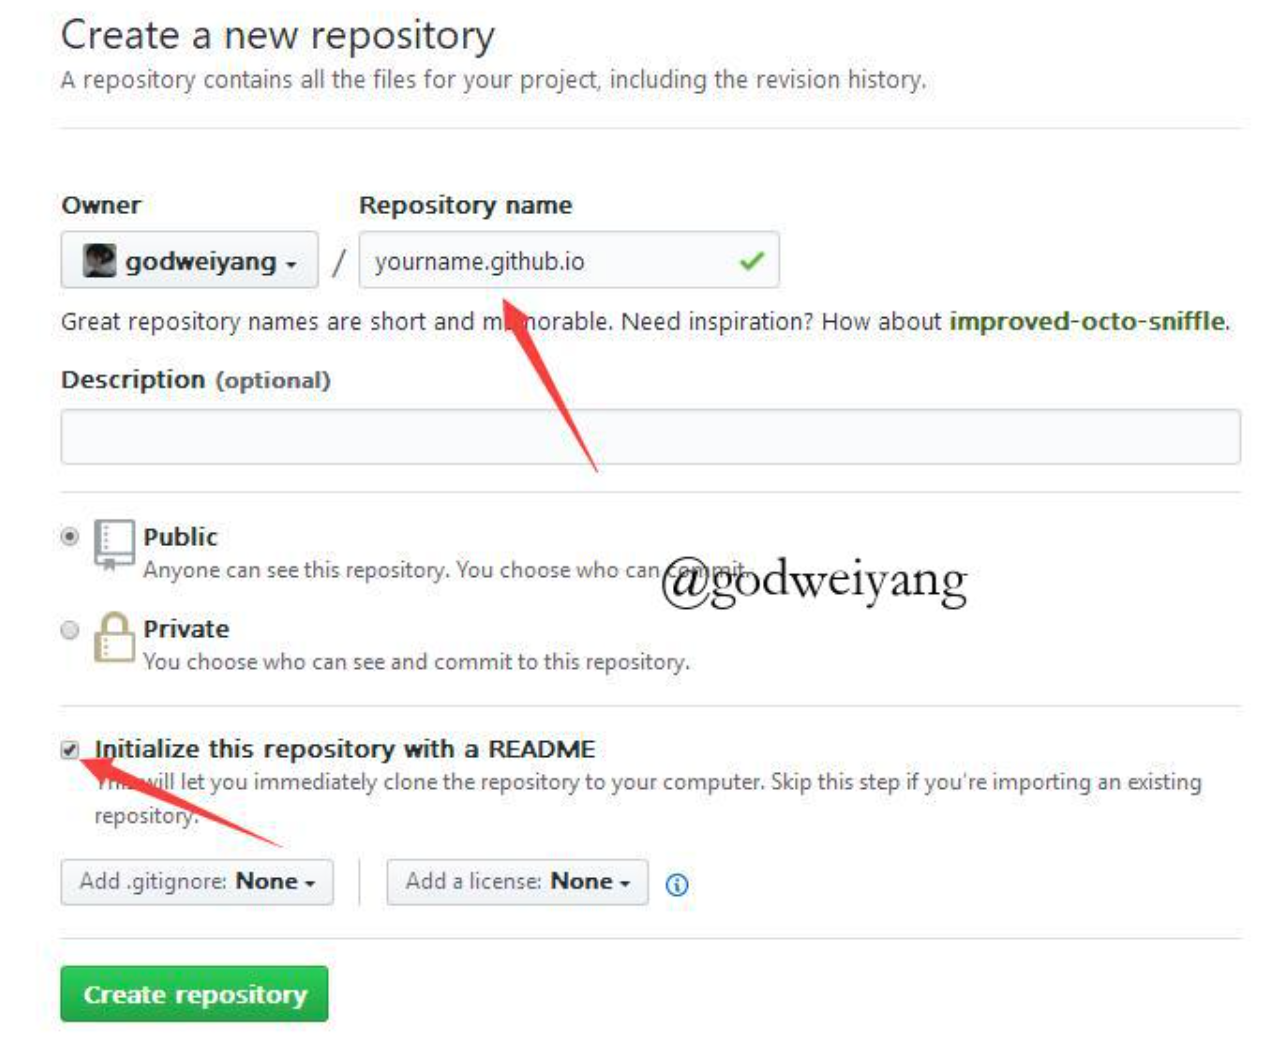
image.png|500

安装 Hexo

首先新建一个目录用于存放博客,路径中最好不要有中文,否则可能会出现问题。在此目录下右键点击 Git Bash Here,输入 npm i hexo-cli -g 进行安装,安装完成之后输入 hexo -v 验证是否安装成功。

安装完成之后输入 hexo init 初始化文件夹,接着输入 npm install 安装必备的组件。

这样本地的网站配置也弄好啦,输入 hexo g 生成静态网页,然后输入 hexo s 打开本地服务器,然后浏览器打开 http://localhost:4000/,就可以看到博客了。

如果出现类似以下的错误:

1
2
3
4
5
6
$ hexo s
INFO Validating config
FATAL Permission denied. You can't use port 4000.
FATAL {
err: Error: listen EACCES: permission denied 0.0.0.0:4000
……

有可能时因为 4000 端口已经被占用,可以通过以下命令暂时修改启动端口为 5000,然后访问 http://localhost:5000/ 即可。

1
hexo s -p 5000

Hexo 的官方文档放在了参考资料部分供查阅。

连接 GitHub 与本地

首先右键打开 git bash,然后输入以下命令:

1
2
git config --global user.name "your_user_name"
git config --global user.email "your_user_email.com"

然后生成密钥 SSH key

1
ssh-keygen -t rsa -C " your_user_email.com "

打开 GitHub,在头像下面点击 settings,再点击 SSH and GPG keys,新建一个 SSH,名称任意。

接下来在 Git Bash 中输入:

1
cat ~/.ssh/id_rsa.pub

将输出的内容复制到框中,点击确定保存。

输入 ssh -T git@github.com ,如果出现你的用户名,那就成功了。

打开博客根目录下的 _config.yml, 在末尾增加以下内容:

1
2
3
4
deploy:
type: git
repository: https://github.com/your_user_name/your_user_name.github.io
branch: main

将博客部署至云端

首先在博客根目录下右键打开 Git Bash,安装一个扩展 npm i hexo-deployer-git

然后输入 hexo new post "article title",新建一篇文章。

source\_posts 目录下就会增加一个 .md 文件,编写完此文件后,根目录下输入 hexo g 生成静态网页,然后输入 hexo s 可以本地预览效果,最后输入 hexo d 上传到 GitHub 上,此时 github. Io 主页即可看到发布的文章(hexo c 可以清除之前的生成文件)。注意 .gitignore 文件中需要将一些文件进行忽略,我的 .gitignore 文件如下:

1
2
3
4
5
6
7
8
9
.DS_Store
Thumbs.db
db.json
*.log
node_modules/
public/
.deploy*/
_multiconfig.yml
.vscode/*

另外根据 Hexo 官方 GitHub Pages 说明, 如果不想发布源文件,需要借助 GitHub 的 Action 进行持续部署,这里在博客项目根目录下新建一个 .github/workflows 文件夹,在此文件夹下新建一个 pages.yml 文件,内容如下:

1
2
3
4
5
6
7
8
9
10
11
12
13
14
15
16
17
18
19
20
21
22
23
24
25
26
27
28
29
30
31
32
33
34
name: Pages

on:
push:
branches:
- main # default branch

jobs:
pages:
runs-on: ubuntu-latest
permissions:
contents: write
steps:
- uses: actions/checkout@v2
- name: Use Node.js 20.x
uses: actions/setup-node@v2
with:
node-version: "20"
- name: Cache NPM dependencies
uses: actions/cache@v2
with:
path: node_modules
key: ${{ runner.OS }}-npm-cache
restore-keys: |
${{ runner.OS }}-npm-cache
- name: Install Dependencies
run: npm install
- name: Build
run: npm run build
- name: Deploy
uses: peaceiris/actions-gh-pages@v3
with:
github_token: ${{ secrets.GITHUB_TOKEN }}
publish_dir: ./public

这里 Node.js 以及 node-version 后面填入的版本数字要修改为自己的 Node 版本,通过 node -v 查看。

image.png|900

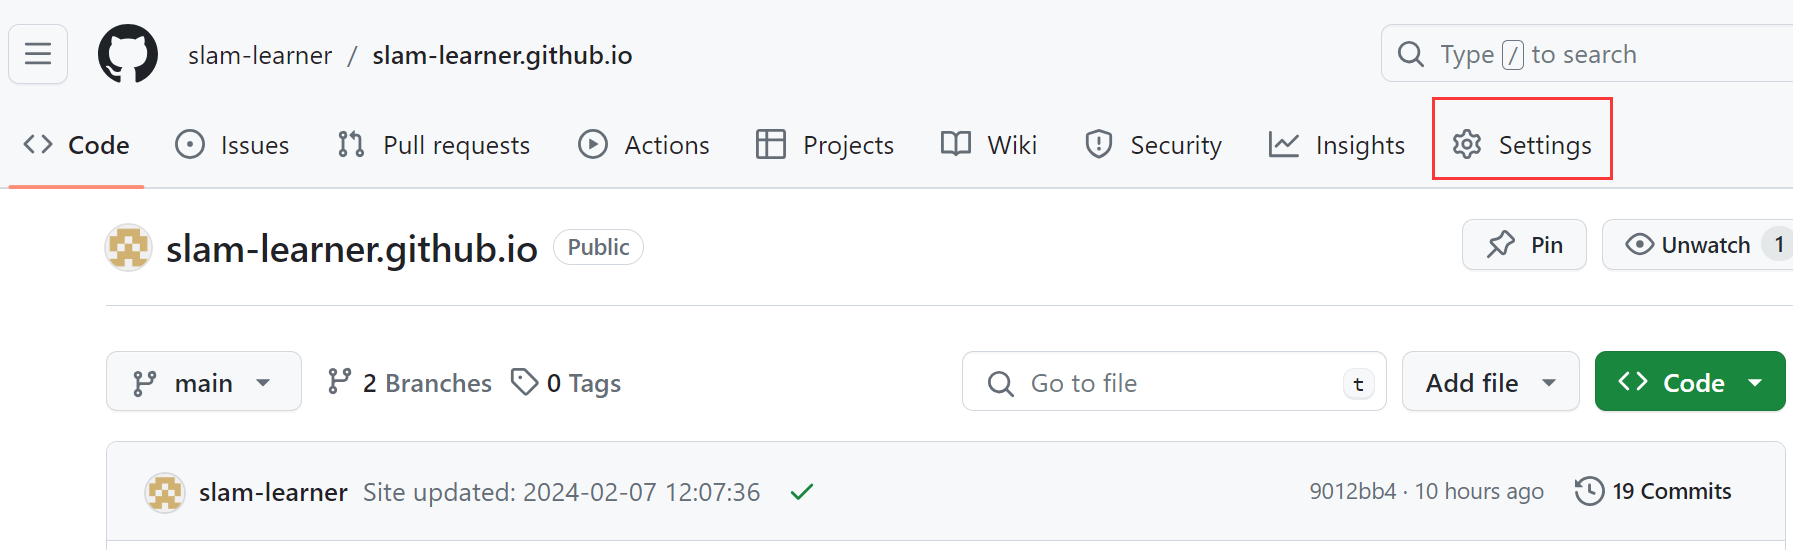
在存放博客 Repo 的 Settings 中,修改 Pages 中的设置如下:

image.png|900

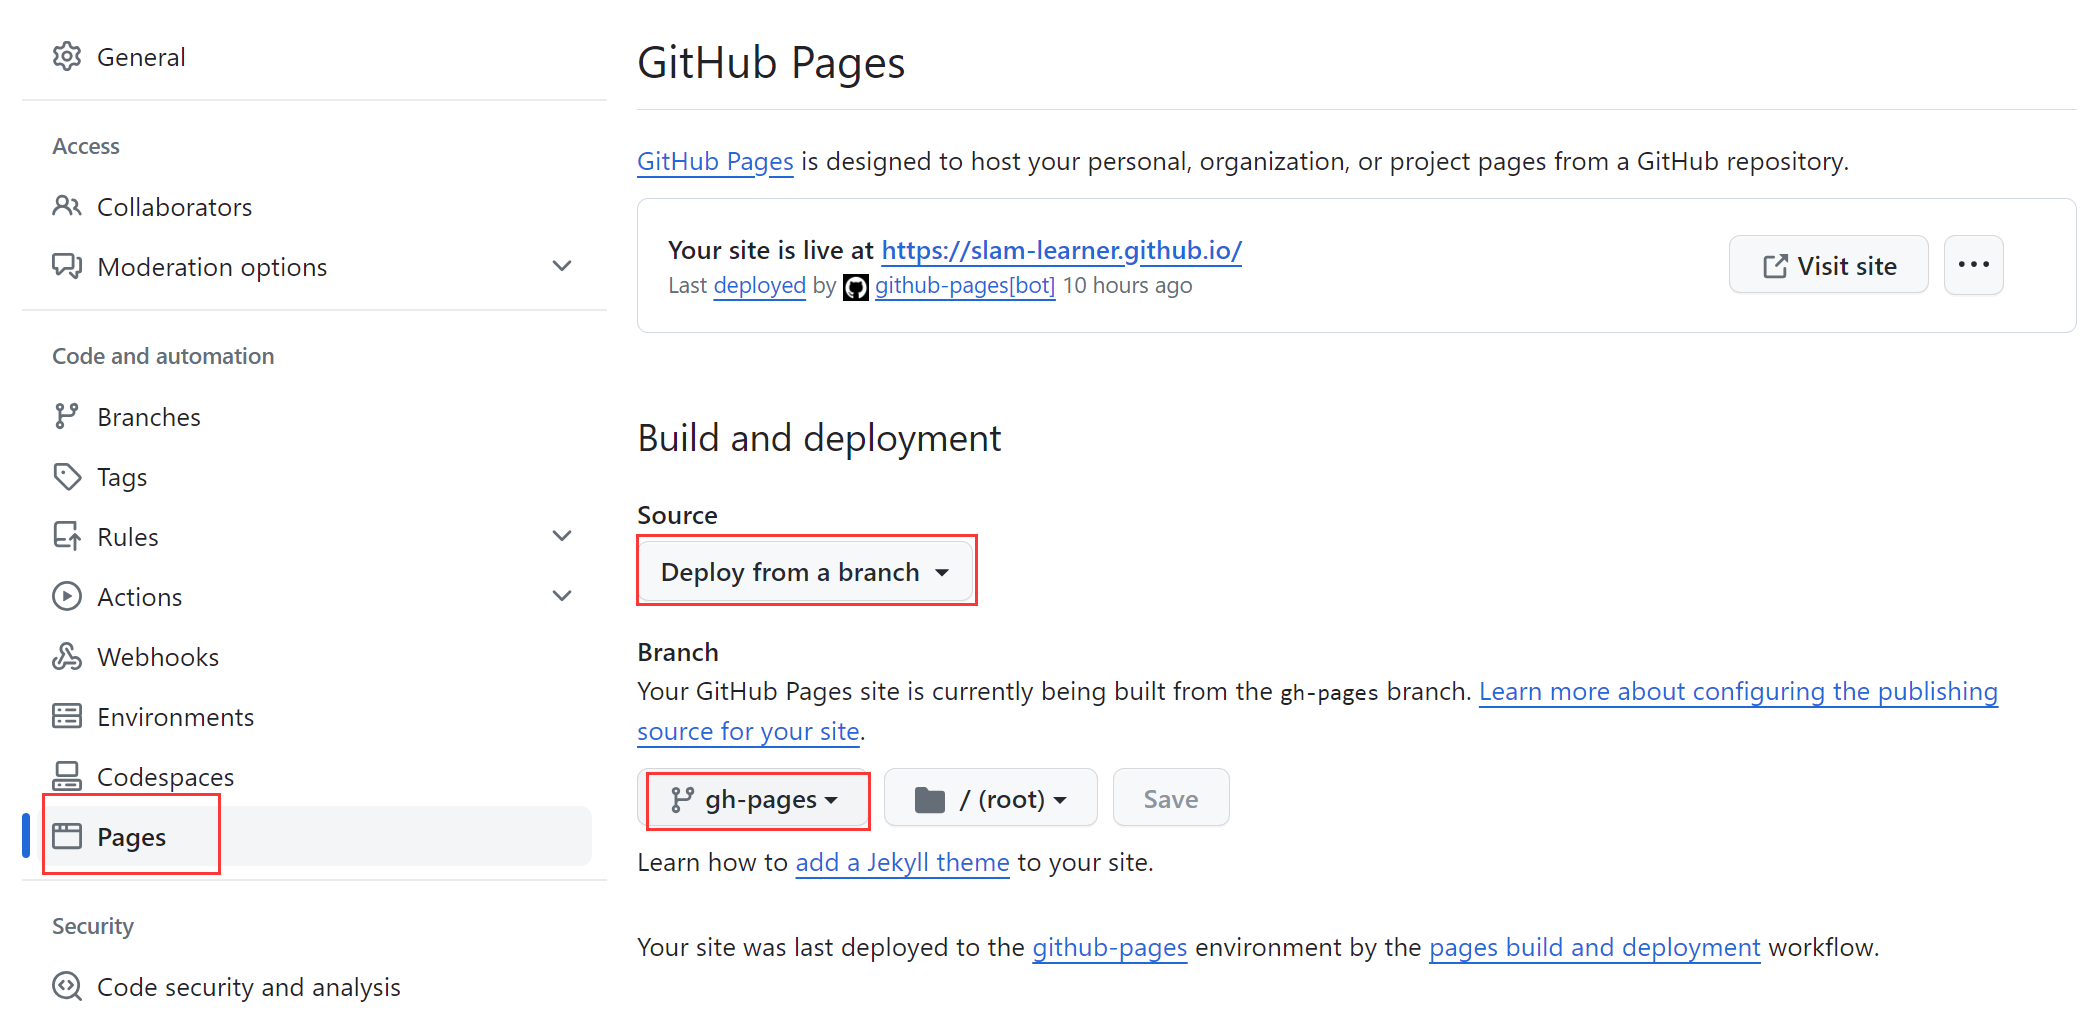
如果没有 gh-pages 分支,则新建一个 gh-pages 分支。

此时就完成了部署相关的配置。

让博客被搜索引擎检索

参考 hexo框架下的博客提交至google搜索

Next 主题相关设置

一些前置设置与相关知识

首先需要明白几个与样式相关的设置文件,假如安装了 next 主题,那么有以下三个 yml 文件可以进行样式相关的设置:

  1. 博客项目根目录下的 _config.yml 文件,它包含了全局的设置
  2. 博客项目根目录下的 _config.next.yml 文件(需要自己创建)
  3. 主题目录下 (根据安装方式的不同,可能是 node_modules/next 或者是 thems/next)的 _config.yml 文件。

这三个文件的优先级由高到低(1 与 2 的优先级顺序不确定),前者的设置可以覆盖后者的设置,另外在博客 markdown 文件中也可以在文件头增加标签来进行一些行为的覆盖,这个在后面会提到。根据官方文档,作者推荐以第 2 个文件的方式进行设置,这里为了方便直接在第 3 个文件也就是主题的源文件上进行了修改,如果后续更新主题的话可能会产生一些问题,如果配置完成后不打算升级主题也可以直接在第 3 个文件上进行修改。

本人的全局设置文件(博客项目根目录下的 _config.yml 文件)如下:

1
2
3
4
5
6
7
8
9
10
11
12
13
14
15
16
17
18
19
20
21
22
23
24
25
26
27
28
29
30
31
32
33
34
35
36
37
38
39
40
41
42
43
44
45
46
47
48
49
50
51
52
53
54
55
56
57
58
59
60
61
62
63
64
65
66
67
68
69
70
71
72
73
74
75
76
77
78
79
80
81
82
83
84
85
86
87
88
89
90
91
92
93
94
95
96
97
98
99
100
101
102
103
104
105
106
107
108
109
110
111
112
113
114
115
116
117
118
119
120
121
122
123
124
125
126
127
128
129
# Hexo Configuration
## Docs: https://hexo.io/docs/configuration.html
## Source: https://github.com/hexojs/hexo/

# Site
title: ydxの博客
subtitle: 一个普普通通的帅比罢了
description: 江苏大学 | 车辆工程 | SLAM
keywords: "VSLAM IMU LIDAR GNSS INSS"
author: ydx
language:
- zh-CN
timezone: Asia/Shanghai

# URL
## Set your site url here. For example, if you use GitHub Page, set url as 'https://username.github.io/project'
url: https://slam-learner.github.io/
root: /
permalink: :year/:month/:day/:title/
permalink_defaults:
pretty_urls:
trailing_index: true # Set to false to remove trailing 'index.html' from permalinks
trailing_html: true # Set to false to remove trailing '.html' from permalinks

# Directory
source_dir: source
public_dir: public
tag_dir: tags
archive_dir: archives
category_dir: categories
code_dir: downloads/code
i18n_dir: :lang
skip_render:

# Writing
new_post_name: :title.md # File name of new posts
default_layout: post
titlecase: false # Transform title into titlecase
external_link:
enable: true # Open external links in new tab
field: site # Apply to the whole site
exclude: ''
filename_case: 0
render_drafts: false
post_asset_folder: false
relative_link: false
future: true
highlight:
enable: true
line_number: true
auto_detect: false
tab_replace: ''
wrap: true
hljs: false
prismjs:
enable: false
preprocess: true
line_number: true
tab_replace: ''

# Home page setting
# path: Root path for your blogs index page. (default = '')
# per_page: Posts displayed per page. (0 = disable pagination)
# order_by: Posts order. (Order by date descending by default)
index_generator:
path: ''
per_page: 10
order_by: -date

# Category & Tag
default_category: uncategorized
category_map:
tag_map:

# Metadata elements
## https://developer.mozilla.org/en-US/docs/Web/HTML/Element/meta
meta_generator: true

# Date / Time format
## Hexo uses Moment.js to parse and display date
## You can customize the date format as defined in
## http://momentjs.com/docs/#/displaying/format/
date_format: YYYY-MM-DD
time_format: HH:mm:ss
## updated_option supports 'mtime', 'date', 'empty'
updated_option: 'mtime'

# Pagination
## Set per_page to 0 to disable pagination
per_page: 10
pagination_dir: page

# Include / Exclude file(s)
## include:/exclude: options only apply to the 'source/' folder
include:
exclude:
ignore:

# Extensions
## Plugins: https://hexo.io/plugins/
## Themes: https://hexo.io/themes/
theme: next
# remote_theme: next-theme/hexo-theme-next

# Deployment
## Docs: https://hexo.io/docs/one-command-deployment
deploy:
type: git
repo: git@github.com:slam-learner/slam-learner.github.io.git
branch: main

inject:
head:
- <link href="https://fonts.googleapis.com/css2?family=Noto+Serif+SC&display=swap" rel="stylesheet">
script:

search:
path: search.xml
field: post
format: html
limit: 10000

symbols_count_time:
time: true # 文章阅读时长
symbols: true # 文章字数统计
total_time: true # 站点总阅读时长
total_symbols: true # 站点总字数统计
exclude_codeblock: true # 排除代码字数统计

这里主要参考了利用 GitHub + Hexo + Next 从零搭建一个博客, 并根据自己的喜好选择性的进行了配置,Next 主题的设置以及相关修改如下。

Next 主题的安装

首先安装 Next 主题,这里有两种方式。

方式 1: 以包的形式安装

在博客项目根目录下打开 Git Bash,执行以下命令:

1
npm install hexo-theme-next --save

升级时执行:

1
npm install hexo-theme-next@latest

详细资料参考 Next 官方-Get started

方式 2:以源码安装主题

在博客项目根目录下打开 Git Bash,执行以下命令:

1
git clone https://github.com/theme-next/hexo-theme-next themes/next

实际上方式 1 安装的包的内容与方式 2 获取的源码是相同的,方式 1 安装的主题可以在 node_modules/hexo-theme-next 中看到,也可以在采用方式 1 安装包之后将其移动至 themes 文件夹下并重命名为 next。

安装完成后在项目根目录下的 _config.yml 中将 themes 的值设置为 next 即可。

这里我的 Next 版本为 8.18.0(你可以在 themes/next/package. Json 中看到)。如果版本不同可能会有一些选项存在差异,请参考官方文档及其他网络资料进行设置。

标签页与分类页

现在博客只有首页和文章页,如果想要标签页和分类页需要自行添加,首先在根目录下执行以下命令:

1
2
hexo new page tags
hexo new page categories

上面的命令会自动生成 source/tags/index.mdsource/categories/index.md,可以在两个 md 文件中添加 type 字段来指定页面的类型。

1
2
type: tags
comments: false
1
2
type: categories
comments: false

然后在主题的 _config.yml 文件中将这个页面的链接添加到主菜单中,修改 menu 字段如下:

1
2
3
4
5
6
7
8
9
menu:
home: / || home
#about: /about/ || user
tags: /tags/ || tags
categories: /categories/ || th
archives: /archives/ || archive
#schedule: /schedule/ || calendar
#sitemap : /sitemap. Xml || sitemap
#commonweal: /404/ || heartbeat

之后在位于 source/_posts 文件夹中的文章的文件头增加对应的字段即可自动出现在相应的标签页和分类页中:

1
2
3
4
5
6
7
8
9
10
11
---
title: 标题 # 自动创建,如 hello-world
date: 日期 # 自动创建,如 2019-09-22 01:47:21
tags:
- 标签1
- 标签2
- 标签3
categories:
- 分类1
- 分类2
---

搜索页

如果想要增加一个搜索页面用来搜索全站的内容,首先需要先安装 hexo-generator-searchdb 插件,命令如下:

1
npm install hexo-generator-searchdb --save

然后在项目的 _config.yml 里面添加搜索设置如下:

1
2
3
4
5
search:
path: search.xml
field: post
format: html
limit: 10000

主题的 _config.yml 修改如下:

1
2
3
4
5
6
7
8
9
10
11
12
13
# Local search
# Dependencies: https://github.com/wzpan/hexo-generator-search
local_search:
enable: true
# If auto, trigger search by changing input.
# If manual, trigger search by pressing enter key or search button.
trigger: auto
# Show top n results per article, show all results by setting to -1
top_n_per_article: 5
# Unescape html strings to the readable one.
unescape: false
# Preload the search data when the page loads.
preload: false

这里用的是 Local Search,如果想启用其他是 Search Service 的话可以参考官方文档

主题配置

此后所述的修改如果没有特殊说明均针对 themes/next/_config.yml 文件。

TIP:
可以在修改前先执行 hexo c && hexo g && hexo s 打开本地预览,在修改了设置后刷新本地预览即可看到修改效果。

样式

Next 提供了以下四种样式,我选用的是 Gemini 样式。
image.png
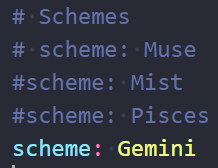
修改不同的样式进行预览选用自己喜欢的一种即可。
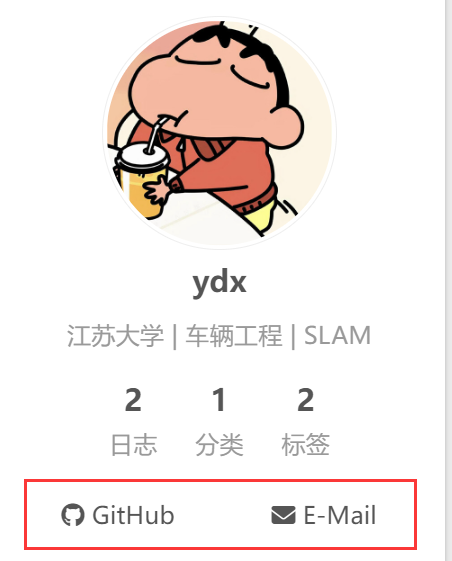
头像

将头像文件放置到 themes/next/source/images/avatar. Png 路径,然后在 主题_config.yml 文件中编辑 avatar 的配置,修改为正确的路径即可。

1
2
3
4
5
6
7
8
9
10
# Sidebar Avatar
avatar:
# In theme directory (source/images): /images/avatar.gif
# In site directory (source/uploads): /uploads/avatar.gif
# You can also use other linking images.
url: /images/avatar.png
# If true, the avatar would be dispalyed in circle.
rounded: true
# If true, the avatar would be rotated with the cursor.
rotated: true

这里有 rounded 选项是是否显示圆形,rotated 是是否带有旋转效果。

代码块

我的设置如下:

1
2
3
4
5
6
7
8
9
10
11
12
13
14
15
16
17
18
codeblock:
# Code Highlight theme
# All available themes: https://theme-next.js.org/highlight/
theme:
light: default
dark: github-dark
prism:
light: prism
dark: prism-dark
# Add copy button on codeblock
copy_button:
enable: true
# Available values: default | flat | mac
style: mac
# Fold code block
fold:
enable: true
height: 200

进入注释中的网站可以查看不同样式的效果,light 设置的是浅色模式下的样式,dark 设置的是深色模式下的样式。fold 会开启代码块折叠,height 设置折叠阈值。

Top

我们在浏览网页的时候,如果已经看完了想快速返回到网站的上端,一般都是有一个按钮来辅助的,这里也支持它的配置,修改 _config.ymlback2top 字段即可,我的设置如下:

1
2
3
4
5
6
back2top:
enable: true
# Back to top in sidebar.
sidebar: false
# Scroll percent label in b2t button.
scrollpercent: true

enable 默认为 true,即默认显示。sidebar 如果设置为 true,按钮会出现在侧栏下方,scrollpercent 显示阅读百分比。

Reading_process

reading_process 打开后网页的最上侧会出现一个细细的进度条,代表页面加载进度和阅读进度。

1
2
3
4
5
6
reading_progress:
enable: true
# Available values: top | bottom
position: top
color: "#222"
height: 2px

Github Banner

页面的右上角会有个 GitHub 图标,点击之后可以跳转到源码页面。

1
2
3
4
github_banner:  
enable: true
permalink: https://github.com/your_user_name/your_user_name.github.io
title: NightTeam GitHub

去除页面底部 powered by

1
powered: false

个人社交媒体

image.png

在主题 yml 文件中找到 social 项,将自己的信息填入即可。

标签图标

默认标签前用 #,可以将 tag_icon 设为 true 改为使用图标。

Ribbon 动态背景

canvas_ribbonenable 设置为 true

打赏

修改 reward_settingsreward 中的选项。

阅读全文

这里参考了一些文章的设置但是似乎没有生效,不过可以在文章想要省略的部分前加入 <!-- more --> 来实现首页中文章的折叠,点击 阅读全文 才显示全部。

字体大小调整

根据 https://www.techgrow.cn/posts/fef9e726.html 在评论区中提到的字体调整方法,
这里根据本人喜好将字体调小了一些,修改 themes/next/source/css/_variables/base.styl 文件中的 $font-size-base 的值为 .875em

启用图片点击居中预览

更改 Next 主题的配置文件 themes/next/_config.yml,设置以下内容:

1
mediumzoom: true

统计

访问流量统计 (busuanzi 统计):busuanzi_countenable 设置为 true
字数阅读时长统计:
首先需要安装插件,由于安装了多个插件,这里不确定是哪个在生效,所以可以都进行安装。

1
2
3
4
5
6
7
# 安装依赖
npm install eslint --save

# 安装插件
npm install hexo-symbols-count-time --save
npm install hexo-wordcount --save
npm install hexo-word-counter --save

在博客的根目录里,找到 _config.yml 文件,然后添加如下的配置项:

1
2
3
4
5
6
symbols_count_time:
time: true # 文章阅读时长
symbols: true # 文章字数统计
total_time: true # 站点总阅读时长
total_symbols: true # 站点总字数统计
exclude_codeblock: true # 排除代码字数统计

更改 Next 主题的配置文件 themes/next/_config.yml,设置以下内容:

1
2
3
4
symbols_count_time:
separated_meta: false # 是否另起一行显示(即不和发表时间等同一行显示)
item_text_post: true # 首页文章统计数量前是否显示文字描述(本文字数、阅读时长)
item_text_total: false # 页面底部统计数量前是否显示文字描述(站点总字数、站点阅读时长)

Gitalk

由于 Hexo 的博客是静态博客,而且也没有连接数据库的功能,所以它的评论功能是不能自行集成的,但可以集成第三方的服务。 Next 主题里面提供了多种评论插件的集成,有 changyan | disqus | disqusjs | facebook_comments_plugin | gitalk | livere | valine | vkontakte 这些。这里选择 gitalk,也就是 GitHub 提供的服务。可以参考 B 站视频 进行注册操作获取到 Client ID、Client Secret,yml 文件由于版本的问题存在差异,根据注释中的说明填入对应的值即可。

首先需要在 _config.yml 文件的 comments 区域配置使用 gitalk

1
2
3
4
5
6
7
# Multiple Comment System Support
comments:
# Available values: tabs | buttons
style: tabs
# Choose a comment system to be displayed by default.
# Available values: changyan | disqus | disqusjs | facebook_comments_plugin | gitalk | livere | valine | vkontakte
active: gitalk

主要是 comments. Active 字段选择对应的名称即可。然后找到 gitalk 配置,添加它的各项配置:

1
2
3
4
5
6
7
8
9
10
11
12
13
14
15
# Gitalk
# Demo: https://gitalk.github.io
# For more information: https://github.com/gitalk/gitalk
gitalk:
enable: true
github_id: NightTeam
repo: nightteam.github.io # Repository name to store issues
client_id: {your client id} # GitHub Application Client ID
client_secret: {your client secret} # GitHub Application Client Secret
admin_user: germey # GitHub repo owner and collaborators, only these guys can initialize gitHub issues
distraction_free_mode: true # Facebook-like distraction free mode
# Gitalk's display language depends on user's browser or system environment
# If you want everyone visiting your site to see a uniform language, you can set a force language value
# Available values: en | es-ES | fr | ru | zh-CN | zh-TW
language: zh-CN

可切换的暗黑模式

Next 主题提供了暗黑模式,但是无法提供手动切换。这里参考 clay 的技术空间 进行了设置。

首先安装 hexo-next-darkmode 插件:

1
npm install hexo-next-darkmode --save

然后在 Next 主题的 _config.yml 配置文件里添加以下内容:

1
2
3
4
5
6
7
8
9
10
11
12
13
14
15
16
17
# Darkmode JS
# For more information: https://github.com/rqh656418510/hexo-next-darkmode, https://github.com/sandoche/Darkmode.js
darkmode_js:
enable: true
bottom: '64px' # default: '32px'
right: 'unset' # default: '32px'
left: '32px' # default: 'unset'
time: '0.5s' # default: '0.3s'
mixColor: 'transparent' # default: '#fff'
backgroundColor: 'transparent' # default: '#fff'
buttonColorDark: '#100f2c' # default: '#100f2c'
buttonColorLight: '#fff' # default: '#fff'
isActivated: false # default false
saveInCookies: true # default: true
label: '🌓' # default: ''
autoMatchOsTheme: true # default: true
libUrl: # Set custom library cdn url for Darkmode.js
  • isActivated: true:默认激活暗黑 / 夜间模式,请始终与 saveInCookies: falseautoMatchOsTheme: false 一起使用;同时需要在 NexT 主题的 _config.yml 配置文件里设置 pjax: true,即启用 Pjax。

确保 Next 原生的 darkmode 选项设置为 false,在 Next 的 _config.yml 配置文件中更改以下内容:

1
darkmode: false

一些功能选项

  • Pangu——中英文之间自动添加空格
1
pangu: true
  • Math
    Next 主题对于公式提供了两个渲染引擎,分别是 mathjax 和 katex,后者相对前者来说渲染速度更快,而且不需要 JavaScript 的额外支持,但后者支持的功能现在还不如前者丰富,具体的对比可以看官方文档:https://theme-next.org/docs/third-party-services/math-equations
1
2
3
4
5
6
7
8
9
10
11
12
13
math:
enable: true

# Default (true) will load mathjax / katex script on demand.
# That is it only render those page which has `mathjax: true` in Front-matter.
# If you set it to false, it will load mathjax / katex srcipt EVERY PAGE.
per_page: true

# hexo-renderer-pandoc (or hexo-renderer-kramed) required for full MathJax support.
mathjax:
enable: true
# See: https://mhchem.github.io/MathJax-mhchem/
mhchem: true

上面的设置会让每篇博客默认开启 math,也可以将上面的选项关掉,在想要使用公式的博客的 fronter(文件头)中开启。

Mathjax 的使用需要我们额外安装一个插件,叫做 hexo-renderer-kramed,另外也可以安装 hexo-renderer-pandoc,命令如下:

1
2
npm un hexo-renderer-marked --save
npm i hexo-renderer-kramed --save

参考资料

  1. 韦阳的博客-超详细 Hexo+Github 博客搭建小白教程
  2. Hexo 官方中文文档
  3. Next 官方文档
  4. Next-开始使用
  5. Next-主题配置
  6. 利用 GitHub + Hexo + Next 从零搭建一个博客
  7. Hexo Next 8.x 主题添加可切换的暗黑模式
  8. Hexo Next 主题详细配置之一
  9. Hexo Next 主题详细配置之二